Shower Tray Leaking? How to Find It
TL;DR
Test the waste first: block the plughole, fill the tray with a few centimetres of water, and leave it an hour without showering. If it leaks, the waste or the tray is the problem. If it stays dry, run the shower without anyone in it - a leak that only appears then points to the sealant or the screen rather than the tray.
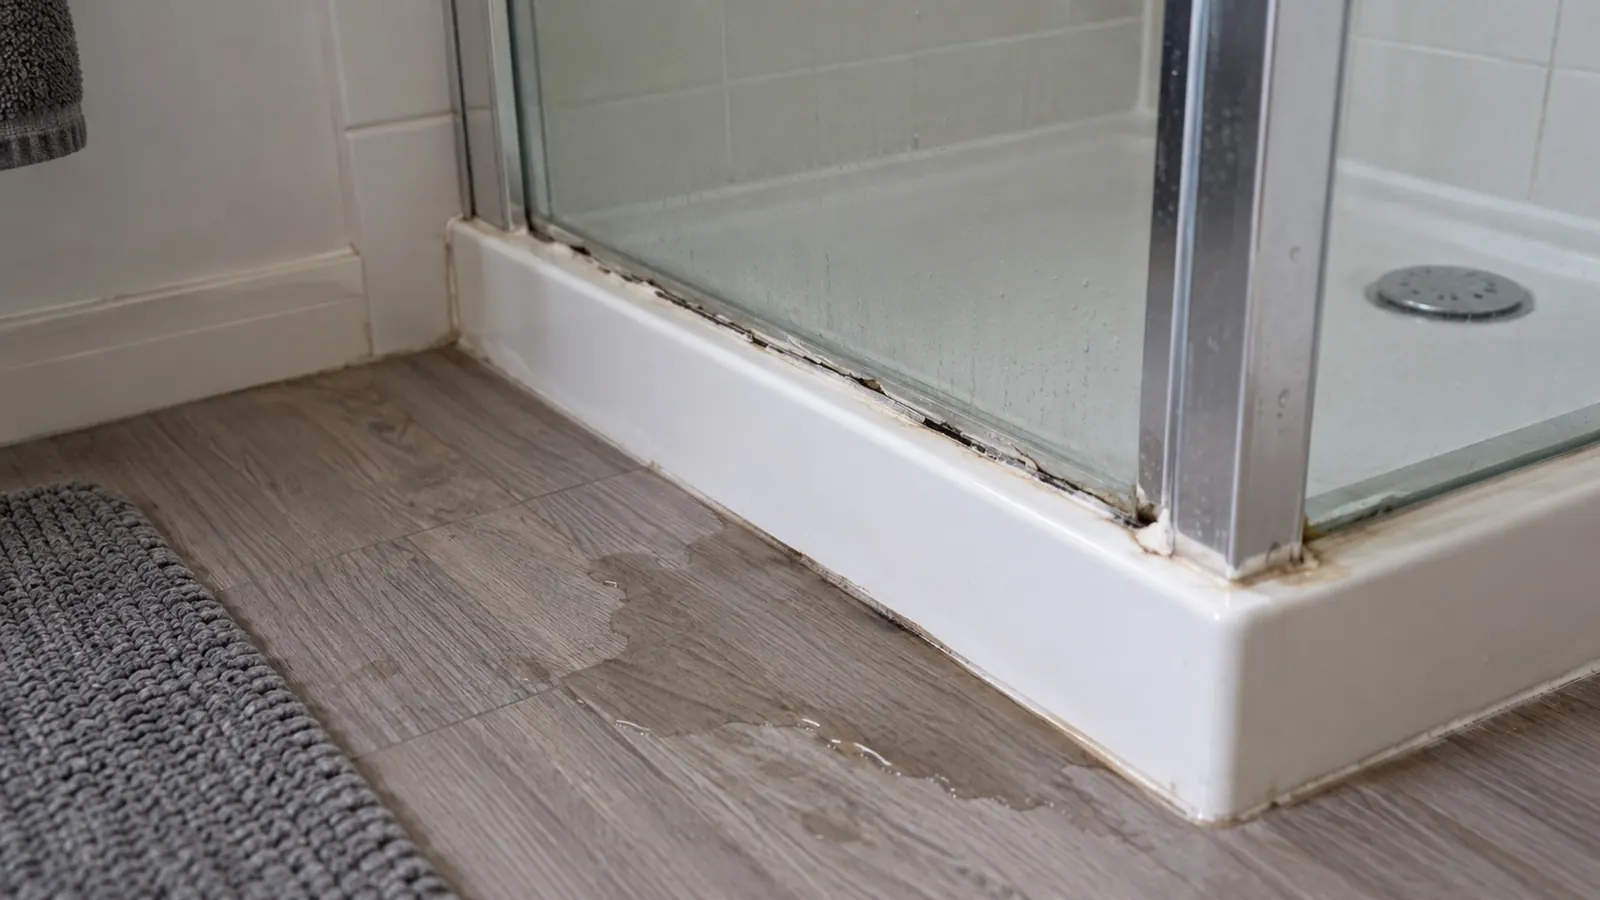
A shower leak is one of the more destructive domestic leaks, because it usually goes into a floor void where nobody sees it until the ceiling below stains. The good news is that finding it is methodical, and most causes are cheap to fix if caught early.
The Two Tests That Isolate It
Do these in order. Between them they separate a waste leak from a sealant leak, which are completely different repairs.
Test 1: Standing water - is it the waste or tray?
- Block the plughole thoroughly. A plumber's test plug is ideal; a well-wedged rubber plug and a cloth will do.
- Fill the tray with a few centimetres of water.
- Mark the level and leave it an hour. Do not use the shower.
- Check below and around for damp.
Water level drops, or damp appears: the leak is in the waste, the tray itself, or the seal between them.
Level holds and nothing is damp: the tray and waste are sound. Move to test 2.
Test 2: Running water - is it the seal or the screen?
Run the shower for ten minutes with nobody standing in the tray, directing the spray away from the screen. Then run it again directing spray onto the screen and the wall junction.
If damp appears only in the second case, the problem is sealant or the screen seals - not the tray.
Cause 1: Failed Silicone
The most common cause by a distance. Silicone around the tray edge has a limited life - it shrinks, loses adhesion and develops hairline gaps, particularly in the corners where movement is greatest.
Doing it properly
- Cut and scrape out all the old silicone. New sealant will not bond to old.
- Clean the joint with methylated spirit and let it dry completely.
- Fill the tray with water before sealing. This is the step people skip and it matters - the weight pushes the tray down to its working position, so the joint is sealed at its widest. Seal an empty tray and the silicone tears the first time someone stands in it.
- Apply a continuous bead of sanitary-grade silicone and tool it smooth in one pass.
- Leave it to cure fully - usually 24 hours - before draining the tray or using the shower.
Cause 2: The Waste
Shower wastes leak in three places: the seal between waste and tray, the connection to the trap, and the trap itself.
If the standing water test showed a leak, get access underneath if you can - many trays have a removable panel, and if not, the ceiling below sometimes offers access.
Check whether the waste flange has been sealed properly to the tray, whether the trap connections are tight, and whether the trap has cracked. A shallow shower trap is a common weak point.
Cause 3: A Flexing Tray
This is the one that comes back however much silicone you use.
A tray must be fully supported across its base. If it was installed without proper bedding, or the supporting frame has settled, the tray flexes when someone stands on it. That movement breaks the silicone seal repeatedly and, in acrylic trays, eventually cracks the tray.
The sign is unmistakable: stand in the tray and feel or hear movement. A tray that creaks or gives underfoot needs relaying, not resealing.
Cause 4: The Screen or Door Seals
The rubber seals along the bottom of a shower screen perish and distort. Water then runs down the glass and out under the screen rather than into the tray.
Replacement seals are inexpensive and clip on. Also check the screen's own fixing points - the wall profile should be sealed against the tiles.
Cause 5: Behind the Tiles
The most serious cause. If grout has failed, or the wall behind was never tanked, water gets into the substrate and travels. The tiles may look perfect while the board behind them is saturated.
Signs are tiles that sound hollow when tapped, grout that stays dark long after the shower, and damp appearing some distance from the shower itself.
Waterproofing behind tiled wet areas is covered in the guidance published by the Chartered Institute of Plumbing and Heating Engineering. This is a strip-back-and-tank job rather than a repair, and it is why waterproofing is the worst place to economise in a bathroom - see our guide to bathroom installation costs.
What to Do Meanwhile
- Stop using the shower until you know the source - Water UK notes escape of water is among the most common household insurance claims. Every use adds water to the structure.
- Check the ceiling below and keep checking - staining spreads for days after the leak stops.
- Do not just add more silicone over the top of failed sealant. It will not bond and it hides the problem.
Frequently Asked Questions
Why does my shower only leak sometimes?
Usually a tray that flexes under weight, so it leaks only while someone is standing in it. That is why the standing-water test can come back clear on a tray that genuinely leaks in use.
Can I seal over the old silicone?
No. Silicone does not bond to cured silicone. It has to be cut out completely and the surface cleaned before resealing.
How long should shower sealant last?
Three to five years in a family bathroom. Corners fail first. Resealing before it fails is far cheaper than repairing a floor afterwards.
The ceiling below is stained but the shower seems fine.
Water travels along joists before dropping, so the stain is often well away from the source. Do the standing water test rather than assuming the stain marks the spot.
If the Tray Moves
A tray that flexes underfoot will keep breaking its seal no matter how carefully it is resealed, and it needs lifting and bedding properly. We cover Milton Keynes and the surrounding area for bathroom and shower repairs. Get in touch and tell us what the standing water test showed.
Need Professional Advice?
Our Gas Safe registered engineers are ready to help with all your heating needs. Get a free, no-obligation quote today.