How to Fix a Running Toilet: Find the Fault, Then Repair It
TL;DR
Take the cistern lid off and look. Water running into the overflow means the fill valve is not shutting off: lower the float or replace the valve. Water below the overflow but still trickling into the pan means the flush valve seal has failed: clean or replace it. A few drops of food colouring in the cistern for half an hour confirms which. Isolate the water, empty the cistern, and take the old part with you when buying.
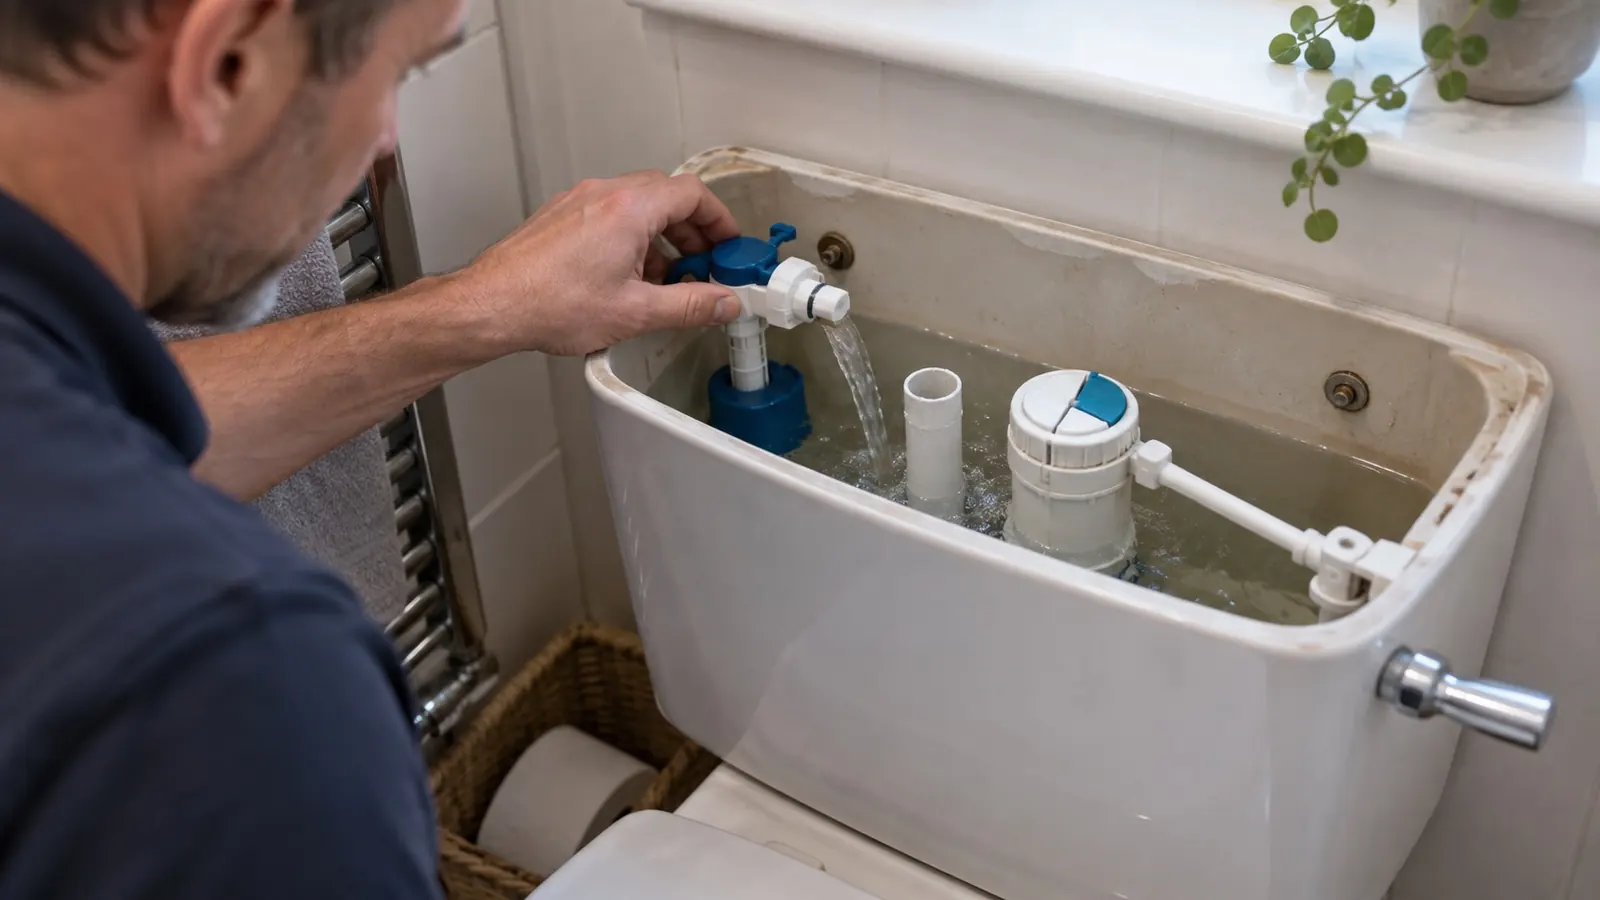
A running toilet is the easiest plumbing fault to ignore, because nothing floods and nothing breaks. It is also one of the most wasteful. A cistern passing water day and night is like leaving a tap running, and if you are on a meter you pay for every litre. The good news is that there are only a handful of causes, a two-minute look tells you which one you have, and none of the repairs need special tools.
This guide does both halves: first the test that identifies the fault, then the repair for each one.
The two-minute test
Take the cistern lid off and set it somewhere safe. They are heavy and chip easily. Now watch where the water is going.
- Water flowing over the top of the overflow pipe: the fill valve is not shutting off. That is a float or fill valve problem (repairs 1 and 3 below).
- Water level sitting below the overflow, but you can see or hear a trickle into the pan: the flush valve is leaking. That is a seal or button problem (repairs 2 and 4).
If you cannot see it clearly, put a few drops of food colouring into the cistern and leave it for half an hour without flushing. Colour in the pan means the flush valve is passing. No colour means the problem is on the fill side. A toilet that refills by itself every few minutes when nobody has used it is the classic sign of a slow flush valve leak: the level drops until the fill valve tops it up again.
Before you start
- Isolate the water. Find the small valve on the pipe feeding the cistern, usually with a screwdriver slot. A quarter turn so the slot lies across the pipe shuts it. If there is no valve, use the main stopcock.
- Empty the cistern. Flush and hold the handle or button down to let as much out as possible, then sponge out the rest. Working in standing water makes every step harder.
- Tools: an adjustable spanner or grips, flat and cross-head screwdrivers, a sponge and bowl, old towels, and the replacement part. Take the old part with you to buy it. Cistern components are not standardised and photos are rarely enough to match them.
Repair 1: adjust the float
The quickest fix, and no parts needed. Use this when water is filling above the overflow. It often happens after someone has raised the level to get a stronger flush and gone slightly too far.
- Float arm (a ball on an arm): turn the small adjustment screw where the arm meets the valve, a quarter turn at a time. On old brass arms you can bend the arm gently downward instead.
- Float cup (a cylinder sliding on a rod): squeeze the clip on the side and slide the cup down the rod a few millimetres.
Turn the water back on, let it fill, and check. Aim for the water sitting about 25mm below the top of the overflow. Go in small steps. Overshoot downward and you get a weak flush instead.
Repair 2: clean or replace the flush valve seal
The most common repair of all, and the one that stops the most water waste, because the water goes straight down the pan rather than into an overflow you might notice.
- With the cistern empty, look at the flush valve, the large plastic assembly in the middle. Most modern ones release with a twist: turn the top section anticlockwise and lift it out. Some have a retaining clip instead.
- Turn it over. The seal is a large rubber ring or disc on the underside. Before you replace anything, clean it. Run a finger round the rubber and round the seat it lands on. Grit and limescale under the seal is a very common cause, and cleaning costs nothing. In a hard water area like Milton Keynes, scale builds on the seat faster than most people expect.
- If the rubber is hardened, split or visibly out of shape, prise it off and fit the new one, making sure it seats evenly all the way round.
- Refit the valve, turn the water on, let it fill, and watch the pan for half an hour without flushing.
If the valve will not come out from above, the cistern may need lifting off the pan. At that point it is worth replacing the whole flush valve rather than just the seal, since you are already there.
Repair 3: replace the fill valve
Use this when the valve will not shut off cleanly and adjusting the float has not fixed it. The symptom is often a hiss that never quite stops. Inside, the diaphragm or seal has hardened and no longer closes against the mains pressure. Some valves take a replacement diaphragm, but on most modern ones a whole new fill valve is easier and barely more expensive. Hard water shortens fill valve life too, so if yours has not lasted as long as you expected, that is usually why.
- With the water off and the cistern empty, undo the supply connection underneath the cistern. Have a bowl ready. There is always water left in the pipe.
- Undo the back nut holding the valve shank through the cistern base and lift the old valve out. Take it with you. Shank length, thread, and bottom or side entry all vary.
- Fit the new valve with its washers in the right order, usually a rubber washer inside the cistern and a plastic one outside. Hand-tighten the back nut, then a small nip with the spanner. No more. Cistern bases are ceramic and they crack.
- Reconnect the supply, turn the water on slowly, and check for weeps at both joints. Set the float and test.
Repair 4: adjust a dual-flush button
Dual-flush cisterns leak more often than single-flush ones, simply because there are more moving parts and a larger seal. A very common cause is mechanical rather than worn: the push rods between the buttons and the valve are too long or misaligned, so the valve never drops fully closed after a flush.
- Remove the flush plate. Most unclip or twist off.
- Press each button and watch the valve underneath. It should lift cleanly and drop fully back.
- If it does not return, shorten the push rods slightly. Most are threaded for exactly this. Retest.
- Check the plate is not fitted so tight that it holds a button partly pressed.
Less common: a damaged overflow
If nothing above fits, look at the internal overflow tube. They can crack or work loose at the base, letting water escape into the pan below the level you would expect. Look for a hairline split along the tube or movement where it joins the flush valve body. Fixing it usually means replacing the flush valve assembly.
Test it properly
Do not assume it has worked. Repeat the food colouring test with the cistern full and leave it half an hour. No colour in the pan means the flush valve is sealing. Then listen. A working cistern is silent between flushes. Any hiss, trickle or self-starting refill means something is still passing. If you are on a meter and want certainty, note the meter reading with everything off, wait an hour, and read it again.
When to replace rather than repair
- Both valves are original and over ten years old. Replace both together and save taking the cistern apart twice.
- The valve body is cracked rather than the seal worn.
- Parts for an old cistern are no longer available.
- A new seal fails again within months. That usually means the seat itself is damaged, and the whole valve needs to go.
The honest bit that a call-out firm would not print: almost every running toilet is a cheap part and half an hour, and if someone quotes you for a new cistern on the first visit without showing you a cracked body or a worn seat, ask why.
If water is escaping onto the floor rather than into the pan, that is a different fault, usually a failed doughnut seal between cistern and pan or a weeping supply joint, and it needs looking at sooner rather than later.
Frequently asked questions
Do I need to turn the water off at the mains? Only if there is no isolation valve on the toilet supply. Most cisterns fitted in the last twenty years have one within reach.
Why does my toilet run for a while after flushing and then stop? That is normal refilling and should finish within about a minute. Anything longer, or a refill that starts on its own, is a fault.
Can I just clean the seal instead of replacing it? Very often, yes. Replace it only if the rubber has hardened or deformed.
Can a running toilet cause damp? Not usually, because the water goes into the pan and away. The cost is on the bill, not the building. The exception is an external overflow on an older property, which drips down the outside wall.
My cistern still refills every few minutes after the repair. Water is still escaping. Do the colour test. Colour in the pan means the flush seal is not seated. No colour means look at the fill valve and the overflow.
If it keeps coming back
A cistern that leaks again within weeks of a new seal usually has a damaged seat, and that means the valve assembly, not the rubber. If you have had a go and it is still running, or the cistern needs lifting off the pan and you would rather not, a plumber in Milton Keynes can sort it in one visit. We cover MK and the surrounding towns for plumbing repairs of exactly this kind. Get in touch and tell us what you saw when you took the lid off. It usually identifies the part before we arrive.
Need Professional Advice?
Our Gas Safe registered engineers are ready to help with all your heating needs. Get a free, no-obligation quote today.